A humming garbage disposal that refuses to spin is one of the most frustrating kitchen emergencies. Whether you are dealing with a sudden standstill mid-prep or a slow, sputtering drain, a jammed disposal can quickly bring your kitchen routine to a halt.
Fortunately, most jams are minor and can be fixed safely with a few basic household tools—without needing to call an expensive plumber.
In this blog, we will walk you through why garbage disposals jam, how to safely clear a clog, and the best habits to prevent future problems.
Why Do Garbage Disposals Jam?
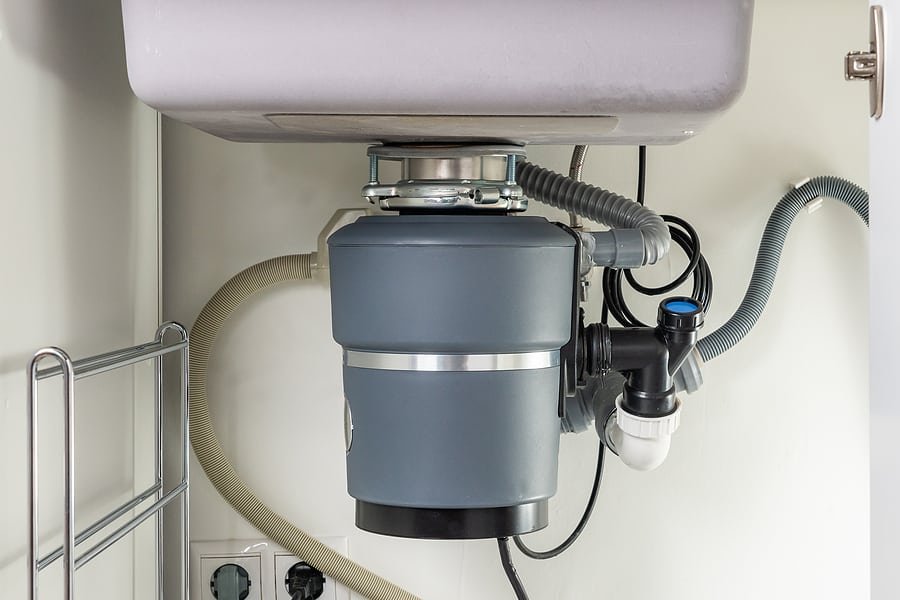
Garbage disposals are workhorses, but they have strict limitations on what they can process. Unlike industrial blenders, standard residential units use impellers (spinning lugs) to throw food waste against a stationary grind ring rather than sharp blades.
When items get wedged between the impellers and the ring, or when sticky, fibrous waste accumulates, the motor stalls to protect itself from burning out.
Common Culprits Behind Jams
Understanding what causes a garbage disposal to lock up is the first step toward prevention. While these units are durable, certain items consistently overwhelm the motor and internal components, bringing your kitchen cleanup to a grinding halt. Avoid these common trouble makers to extend your system’s lifespan.
Fibrous Foods
Stringy items like celery stalks, corn husks, onion skins, and artichokes are notorious disposal killers. Instead of breaking down into fine particles, their tough, fibrous strands wrap tightly around the spinning impellers, causing the motor to stall instantly and forcing you to untangle them manually.
Starchy & Expanding Foods
Foods like cooked pasta, rice, and potato peels spell trouble for your drain. When mixed with water, starches swell and turn into a thick, paste-like sludge. This sticky buildup coats your pipes and clogs the P-trap, slowing drainage and creating stubborn blockages over time.
Hard Objects
Dropping solid items like fruit pits, small bones, glass shards, or silverware into the running disposal creates an immediate hazard. These rigid materials wedge tightly between the spinning lugs and the stationary grind ring, locking the mechanism completely and potentially fracturing internal metal components.
Grease and Fat
Pouring hot cooking oils or bacon grease down the drain is a major mistake. As grease travels down the pipes and cools, it solidifies rapidly. This sticky coating lines your disposal and plumbing, trapping loose food debris and compounding into a heavy, restrictive clog.
Step-by-Step: How to Safely Clear a Jammed Disposal?
Before you attempt any fix, safety is paramount. Never put your hands inside a garbage disposal. Even when unplugged, the internal components have tight pinch points.
Step 1: Cut the Power
Disconnect the disposal from the electrical outlet under your sink. If your unit is hardwired, flip the corresponding breaker off at your main electrical panel.
Step 2: Manually Rotate the Impeller (Hex Wrench Method)
Most garbage disposals feature a hex-shaped socket at the very bottom center of the unit underneath the sink.
- Locate the hex wrench (Allen wrench) that typically comes with the disposal (usually a 1/4-inch wrench). If you don’t have it, a standard Allen wrench of the correct size will work.
- Insert the wrench into the center socket at the bottom of the unit.
- Back and forth, gently wiggle the wrench. If something is wedged, you will feel resistance initially. Rotating it back and forth helps dislodge the trapped debris.
- Once the flywheel moves freely a full 360 degrees, remove the wrench.
Step 3: Inspect from Above (Using Tongs)
Look down into the drain opening with a flashlight.
- Do you see a foreign object, a piece of bone, or silverware?
- Use tongs or pliers—never your fingers—to grab and pull the item out.
Step 4: Reset the Motor
If the disposal overheated due to the jam, its internal circuit breaker will trip.
- Look underneath the disposal housing for a small red or black Reset button.
- Press it firmly until you hear a click.
Step 5: Test the Unit
Plug the disposal back in (or flip the breaker back on). Turn on a steady stream of cold water, flip the wall switch, and test the unit. If it hums or runs smoothly, you have successfully cleared the jam!
Simple Habits to Prevent Future Disposals Jams
Preventing future headaches comes down to mindfulness about what goes down your drain. Follow these golden rules to keep your garbage disposal running smoothly for years to come:
Always Run Cold Water
Keep the cold water running for 10 to 15 seconds before and after running the disposal. Cold water solidifies fats and grease, allowing the disposal to chop them up before they coat your pipes.
Feed Waste in Moderation
Don’t shove an entire plate of leftovers down at once. Feed items in small, manageable batches with the motor running.
Deodorize and Clean Naturally
Toss a few citrus peels (lemon or orange) down the disposal to freshen the scent, or run a handful of ice cubes to help knock away built-up grease and sharpen the grinding ring edges.
What Not to Put Down a Garbage Disposal?
To drastically reduce your risk of clogs, make it a rule never to feed your disposal the following items:
Coffee grounds
They accumulate in the P-trap and form a thick sludge.
Eggshells
While a common myth says they sharpen blades, the membrane inside can stick to the sensor and inner walls.
Chemical Drain Cleaners
Harsh commercial chemicals can corrode metal parts, ruin rubber seals, and splash back up into your face. Stick to manual clearing or baking soda and vinegar flushes.
When to Call a Professional?
If you have cleared the flywheel manually, reset the motor, checked for blockages, and the unit still refuses to turn on—or if it leaks water underneath the sink housing—it may be time to call a licensed plumber. Motors do burn out over time, and a professional can help you determine whether your disposal needs a quick repair or a full replacement.